Here are some of the key points from Maria's presentation at the Spring Creativ Festival 2015.
One of the question often asked about making necklaces, other then techniques, is about the correct length for various styles. This image shows the standard length you will need to adjust to ensure that it will fit the wearer perfectly.
Guidelines for necklace lengths
Essential tools for most beaders include a design board, needles, cutting tools, pliers, personal lighting and a work surface.
Your work surface can vary based on personal preferences, portable and cost. Here are some that Maria uses; bead on it boards have a contained surface and lap trays can allow you to bead as a passenger on road trips. But Maria's personal favourite is Chinet plates. They contain the beads, are inexpensive and portable (dessert-size will fit into a medium ziploc).
Bead on it Board in use
Lap tray is use
Multiple Chinet plates in use
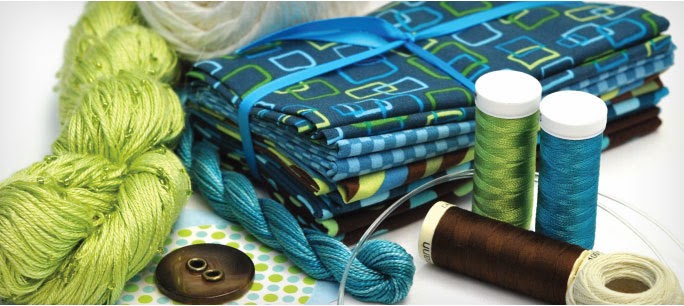
Tools you will need for basic beadweaving are thread trimmers and various size needles.
Beading threads are generally nylon based. Picture below are the various threads including nymo, C-lon, One G, and Fireline.
various beading threads
Use the colour that best blends into your work. Neutrals such as black, white, grey and ash are essential to have available. Colour does matter. Below are two bracelets, one stitch with crystal Fireline and the other with black nymo.
Thread colour matters
Fireline and other products form the fishing world are used where a stronger material is needed.
Getting the needle onto the thread can be a challenge due to the very small eye of fine beading needles. Try needling the thread. Hold the thread between finger and thumb with just a small end showing. Move the needle onto the thread. If you still have trouble flip the needle as the eye of the needle is punch and one side is smoother than the other.
Needling the thread
At some point in a larger project you will have to add new thread. Here is a great video from Melanie Potter, of the School of Beadwork.
Create a slipknot 8-10 inches from the end of your new thread. Slip it onto the old thread. Tighten and slide down on the old thread to the work. Tie the ends with a surgeon's knot (a square knot with an extra twist).
Adding new thread
You will need to secure the ends into the work using circle knots.
Circle around the woven thread between beads, pull end thru the small loop created and pull tight. Repeat a few times for each end.
Circle knot
A helpful tip for finishing a bead woven necklace is to add an extra bead between the clasp and the beadwork.
Here are some different style of closures you can use to add the last finishing touch to your design. Choose a clasp that works with the style, scale and design of the piece.
Toggle work well for bracelets
Tubular clasp are available in different sizes for wider designs.
Ball & Socket closures are very secure
Working with beading wire requires a different set of tools. Crimping pliers, wire cutters, round nose and flat nose pliers. Choose that best tools that you can afford.
Another small but very helpful tool is a beadstopper. You will likely want to have a number of these little springs in your tools collection. Once attached to the beading wire the beadstopper keeps the beads from sliding of the wire. This is very useful when audtioning the beads for your design.
Auditioning pearls & crystals for a bridal necklace
Auditoning various clay and Tagua nut beads for two different styles
Once you have finalized your design for your stringing project you will need to you crimp beads to attach the findings. Here are the steps for crimping crimp beads.
For a more finished look you can use crimp covers over the crimps which hides the crimp within a hollow bead. Another great finishing component is a wire guard. It will protect the wire as it goes thru the finding.
Detail of crimp covers and wire guard
To create earrings or dangles you will need to use head pins and eye pins. Your basic wire tools listed above are all you will need. Here is the basic steps for creating loops on the pins.
Classic dangles added to a larger crystal to make different earring styles
Follow this link to a folder with the three handouts that Maria gave out during the presentation.
Watch for the highlights of Maria's other presentation "Simply Beadweaving" on the weekend.
Wow in just one month spring will officially arrive here in Toronto. After a long a snowy winter it will be great to see green grass and the buds on the trees. One month after the arrival of spring will be the Spring Creativ Festival, April 25 & 26, 2014 at the International Centre.
Here are the details for the three seminars that Maria will be presenting during the show.
Beadwork: Beyond the Kit
Kits are great for learning a technique and beading a ready made style. Once you've mastered the project, it can be repeated in so many different ways. Maria shares techniques on how you can transform an existing pattern into your own unique creation and will inspire you with wonderful examples of designs that go beyond the kit.
Room 105, Friday @ 2:30, Saturday @ 4:30
Beadwork: ABC’s of Beading
This original presentation, inspired by Maria’s blog series “ABC’s of Creativity” highlights examples of bead types, variety of stringing materials available and different tools that can be used for beading. Learn to make the best choices on what to use for different techniques and what's best for your project. Plus, get tips on best use of colour along the way.
Room 105, Friday @ 10:30
Beadwork: Closures & Finishing Tips
Properly finished beadwork is essential to its enjoyment and wearability. Learn about different types of clasps and beaded closures. Get instruction on how to attach and direction on what's best suited to different types of beadwork. Examples of incredibly finished pieces will be shown to inspire you.
Room 105, Saturday @ 10:30
If you have created something based on one of Maria's kits, please send her pictures and details and it may be included in the presentation Beadwork: Beyond the Kit.
A full selection of our kits and patterns will be available during the show @ booth #372. We look forward to seeing you there.
Here in Toronto we are wondering if spring is going to be chased away by a Winter Storm Warning today. But a sure sign of the arrival of spring is the Spring Creativ Festival. It is only two weeks away, April 26 & 27, 2013.
This 2 day Toronto area show is at the International Centre in Mississauga. Free parking and free seminars are two great selling points for the Spring Creativ Festival. Purchasing your tickets online before the show will allow you to enter @ 9 am before the general opening @ 10 am. Your advance tickets also make you eligible to win one of two $900 shopping sprees.
In addition to having a booth (#372) with our kits, patterns and books, Maria will be presenting three informative seminars.
Yes! You Too Can Bead!
Welcome to the
world of beading! Great visuals illustrate all there is to know about
the plethora of beads, metals, stringing materials, beading wires, wire
gauges, tools and findings available in the world of beading. Gain
confidence to discover or perfect your own beading style! Vancouver Room - Fri 9:30
Beadwork: The Finishing Touch
Learn
how to finish your beadwork like a professional. There are many clasps,
stringing materials, crimps and bead tips from which to choose. Maria
shares tips and tricks for finishing off your beadwork project. See how
to add a new thread, crimping tips and more. Vancouver Room - Fri 12:30 . Sat 2:30
Beader's Paint Box
How do you get
your beadwork to pop? Maria shares a little bit of colour theory with
lots of examples to show how to place bead colours, finishes and
metallics against each other. It's easy and will soon become intuitive! Vancouver Room - Sat 11:30
Stop by the booth, #372 to pick up a kit or pattern for some spring beading!
Our beaded soutache bracelet or necklace kits create an elegant textured band. The addition of the stone pendant changes the look of the necklace.
This video was recorded at last spring's Creativ Festival. Maria is demonstrating her diagonal weave bracelet using triangle beads. We will have a selection of diagonal weave kits to make this fun and easy beaded band.
For those with a stash of beads (big or small) we also have patterns as well as Maria's four books.
We look forward to seeing you at the show. Hopefully the weather will be more spring-like that weekend!
"Beader's Paint Box" presentation for Creativ Festival Spring 2013 INDO Bracelet, Lariat & Earrings, Rypan Designs
How do you get your beadwork to pop? Maria's presentations share a little bit of colour theory with lots of examples to show how to place bead colours, finishes and metallics against each other. The visuals make it possible to examine many variation and then apply what was learned in your beading. Color is a phenomenon of light or a visual perception that enable one to differentiate otherwise identical objects. It is described in terms of hue, lightness and saturation for objects; hue, brightness and saturation for light sources. Hue can be contrasted with black or white. (Miriam-Webster Dictionairy) The relationships are best understood with color wheeels, a concept invented by Sir Isaac Newton in 1666. These wheels from Color Matters show the basic concept.
Primary Colors. You can't stir beads to create the secondary or tertiary colors. But you can choose to place them according to the color wheel. These beads all have the same saturation. Black is not a hue. INDO Lariats have novel Indonesian lampwork beads, Rypan Designs
Complementary. These beaded boxes use the very same hues, but vary in their color placement within the same design. "Anemone Box Series" beaded by Jo-Ann Woolverton; inspired by Julia Pretl
Complementary. Using a bit of the opposite color on the wheel gives your beadwork zing. "Wisteria" Textured Net, Rypan Designs
Analogous. Use colors next to each other on the wheel. These warm colors seem to advance. "Coca Cola Bottle Caps" necklace and bracelet by Maria for friend Dolores
Monochromatic. Try tints and shades of the one color to make it interesting. These cool colors seem to recede. Dangle Earrings using Swarovski ELEMENTS®, Rypan Designs
This TBS Bag of Bead Challenge was full of opaque, transparent and silver-lined TEAL seed beads. It also included the pressed glass, buttons and sequins. Two pairs of complimentary beads were strategically placed to create the netted pattern. Note the playful color effects and turnaround beads in the strung fringe. "Sedona Kilim", Maria Rypan, 2000
Rainbow® Color Selector is a 5" wide tool which also comes in a Tonal Color version. It's available from Fire Mountain Gems.
This ultimate color wheel was designed as a fundraiser by Ewelina Rzad. 50 beaders from Poland participated. Soutache and seed bead wrapped cabochons are tastefully layered into a collar. Each cabochon is a mini work of art. Light tinted red and purple hues create the 'V' which turns to cool colors on the right and morphs into warm colors on the left. "Tęczak - The Rainbow". CLICK to see how cabs were wrapped in soutache by the bead artists
Margie Deeb's bible for beaders
This is the only book of its kind written specifically for bead artists, The Beader's Guide to Color teaches beaders of all levels everything they need to know about color to create unique and vibrant beadwork designs. Author and artist Margie Deeb discusses in depth the psychological and symbolic associations of all the colors of the spectrum, and the ways in which color can be used to create and accentuate pattern, rhythm, and movement. Twenty-one color schemes are described and illustrated in detail with accompanying projects.
NEW! Check out Maria's video showing how to do the Diagonal Weave. It's a little known 'gerdany' technique with immense possibilities. It starts off with a foundation and then repeats a 3-bead by 2-bead sequence for a really neat diagonal weave. It can be done with the same-sized beads or Maria's version with larger beads for a textured edge. This was filmed at this spring's Creativ Festival so you get a peak at the grand booth. Besides the close-ups of the steps, its full of beadweaving tips and tricks. Enjoy!
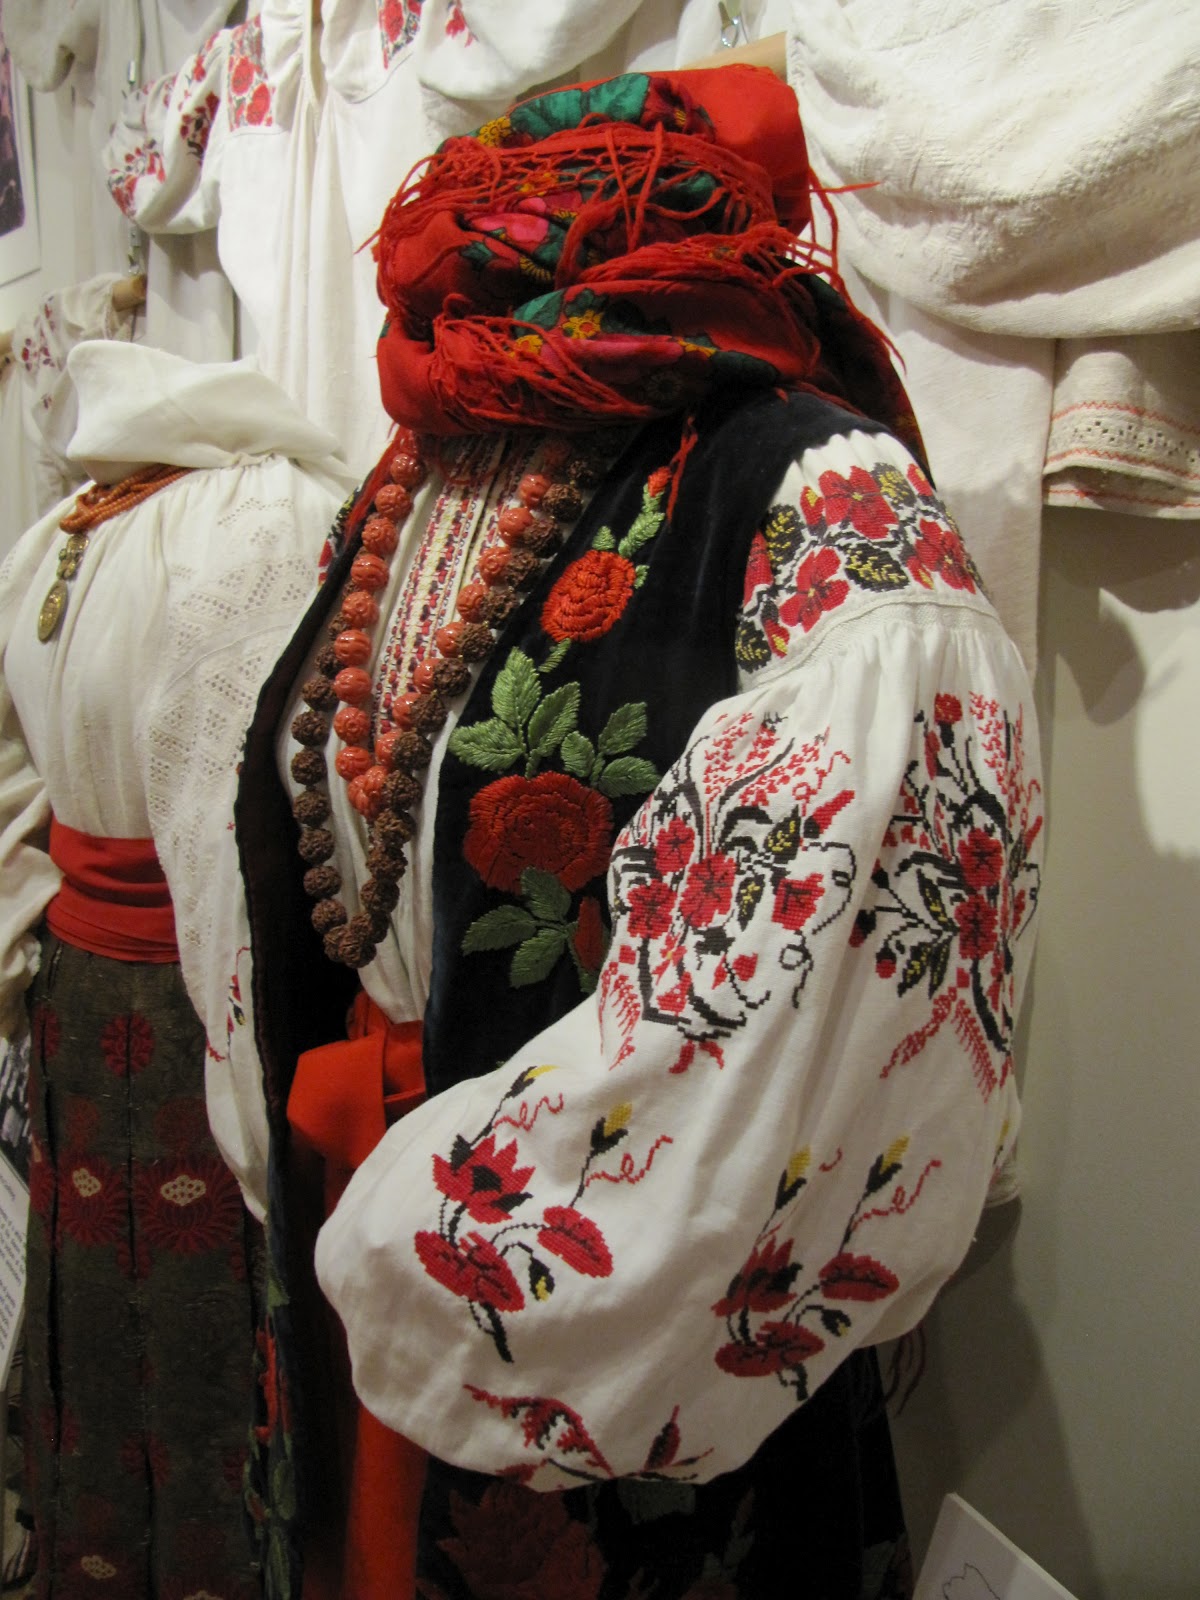
The embroidered "sorochky" exhibit opened Fri, Jun 9th, 2012, and will be on display for two months. There are 88 chemises from the Ukrainian National Museum Collection brilliantly exhibited on walls and a trunk, dramatically featured in a few frames and shown in full costume with bilingual ethnographic information. These were adorned with traditional beadwork: 'korali', 'gerdany', a Lemko 'kryza', a 'dukatch' pendant. And this the tip of the iceberg! There are about 158 'sorochky' from the XIX to XX centuries in their archives. See their video for an idea of what to expect.
East "sorochky' wall. Zakarpattia, Opillia & Volyn mannequins.
Row of "sorochky' on the east wall
The Dnipro Region, UNM Collection
On the way back from the Bead and Button show Monday we specially stopped in Chicago to view this folk art exhibit. Am I ever thankful we did! This was lucky for me, but I assure you this display is well worth the drive!!
Sorochky Exhibit at UNM, Chicago
Could not believe how prevalent the floral motif was in so many 'sorochky'... And how many interpretations and stylizations there were!! We left with a great respect for the culture, tradition, symbolism and awe at the genius of the creators of these works of art.
I now have great material for future visual presentations. My next inspirational one is for this October's Creativ Festival. It's called "Nature Reinterpreted: Adornments and Decor".


