pinterest pin it

Friday, January 27, 2023

Mid-Century Modern Living - Toronto Bead Society 2023 Challenge

Contents of Bag of Beads

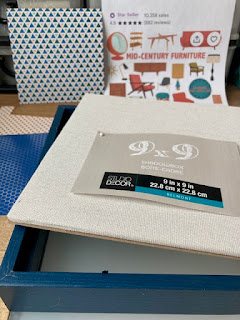
Something very different for this year’s Toronto Bead Society (TBS) Challenge! The hardest part was getting an idea, a theme, once we saw the contents of Bag of Beads.

The craft papers with distinct Retro patterns were the stumper this year! Can’t wait to see what the other bead society members come up with at the February REVEAL!


Since my condo suite was getting all windows and doors replaced in mid-December, I was in tune with furniture, moving, and shlepping everything 6 feet away from the window wall. Once the new windows were installed, we had a chance to redecorate. At first, my idea was WINDOWS, but with three distinct craft paper patterns in my bag, furnishing a room in the mid-century style made perfect sense.

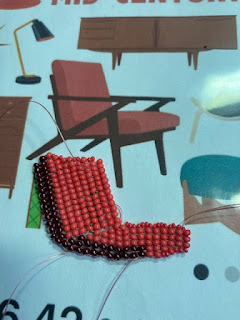
To make Mid-Century Modern Living happen, I needed a reference of furniture styles so I could beadweave a sofa and chair with beads in the bag. Thanks to an Etsy seller for their clip art of mid-century furniture for inspiration.

mid-century living inspiration

For the ultimate presentation, I found the quintessential shadow box at the downtown Michael’s store. A navy wood square frame with a linen-covered board for pinning was purchased the night the windows were supposed to be installed. Now that I had the shadow box frame, my living room with beadwoven 3-D furniture and accessories was ready to begin!

Shadow box linen base

The Mid-Century Modern sofa

I used three stitching techniques to create my light blue sofa in the same size as my printed furniture inspiration. 

The challenge with starting a long section of mosaic (peyote) stitch is making the beads line up for the next row. A quick tip from beading friends made for a clean start and easy to see where to add the third row of beads.

TIP: Slide in a long loomwork needle to separate the first row of the mosaic stitch.

Start of the Modern sofa using peyote stitch

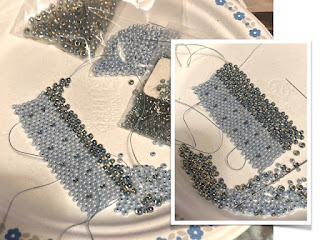
This stitch is easy when you can see the high points and know where to add the next bead row. I created a tufted back effect by adding single copper-lined turquoise seed bead every three beads. First, I started with Even-count Peyote with an easy turn, but my tuft button design forced an Odd-Count variation.

sofa tufted back

As you can see, the long needle has been removed once a beaded fabric was created. Having an assortment of beads around is best for auditioning beads for different effects. Beading in hand is my favourite while watching (listening to) TV

beadweaving in hand

To create a 3-D cushion for my sofa, I added a row of 6/o blue-lined topaz pony beads to the last row of light blue seed beads.

Adding larger beads

From here I was able to Right Angle Weave (R.A.W.) rows of pony beads. First, I tested the idea, then I beadwove the appropriate number of rows of pony beads for the sofa cushion.

testing the width of cushions

Next, I had to zip together the pony beads into a cushion. This was done by folding over the flat pony bead fabric and carefully continuing the R.A.W. stitch to make it 3-dimensional.

Zipping pieces together

For the sofa arms, I started to Brick stitch some seed beads along the edge of the Peyote stitched back and cushion. I started with copper-lined turquoise seeds first, then topped the two rows with light blue beads from the Bag Challenge. There was a lot of auditioning and shaping here.

Brick stitching arms on sofa

A final addition of single light blue seeds between the bottom of the front cushion help turn this mass of beadweaving into a Mid-Century Modern sofa. I added #2 brown Iris bugle feet like the sofa illustration.

adding legs to sofa


The Mid-Century Modern occasional chair

Next, I want to recreate a 3-D chair pictured here in coral seed beads with navy iris twist bugle frame and arms. 

Start of chair in coral beads

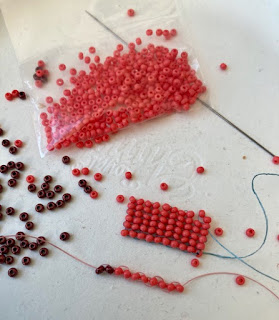
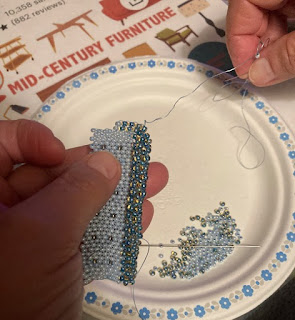
When creating flat 3-dimensional objects, you need to add other colored-beads to represent the contours in the illustrated chair. So, the flat Ndebele stitched coral piece would not work in my Mid-Century living room. 

chair back with shaded side

I started a new piece with a ladder stitch of two metallic chocolate brown seed beads for the cushion side and coral seeds for the back. Then, I added several rows of Ndebele in appropriate colors before shaping the beaded fabric to match the illustrated chair.

ladder stitch start of seat

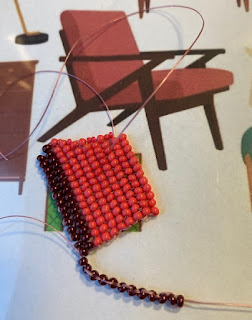
Once satisfied with the chair back, I started a ladder for the seat cushion. This took many tries to create a visually pleasing seat. I’m just showing the process and final variation. 

at work at my beading table

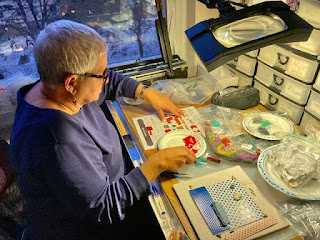
Creating an independent chair took a lot of effort. Here I am at my clean beading room table after the window replacement!

using ndebele for seat

There were many starts and frog stitches in trying to get the shape and contours just right.
This required dropping beads and telling stitches where to go. No right or wrong way of beading. Just a matter of getting a self-contained desired effect!

fitting to inspiration

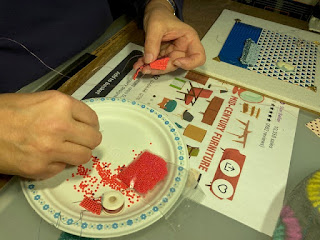
I kept fitting my beadwork to the furniture image.

chair in progress

This Ndebele stitched cushion had many looks. This is last variation. I was constantly referring to the illustration for how to handle the chair arms once the cushion was ready.

finishing chair with 15s

To shape the cushions, I added very fine 15/o seed beads to smooth out the choppy edge created by the Ndebele stitch.

adding chair arms

Long twisted navy iris bugle were going to be the arms and frame of my occasional chair. However, because of the length, I had to supplement #2 and #3 twisted bugles from my stash to get the appropriate lengths and effects. The front arm of the chair was first cobbled together over the top of the beadwoven cushion.

adding second arm to chair

For my chair to be realistic, I needed to add the other arm from behind, as well as chair legs. Note how just placing a long bugle across the lower seat bottom creates a realistic looking chair. It’s all about perspective and illusions. 

Torchiere and potted plant

There were many odd beads that still needed to be used for this challenge. In the bag with the cameo, an optional stumper, there were four jade chicklets and a few oversized pearls.

I stitched together the four jade chicklets into a base for a floor lamp. To add some interest, I added navy iris seed beads, and 8/o matte teal beads in between. I strung a coral seed between the long twisted navy iris bugles for interest and topped it off with an oversized pearl for the bare light bulb. 

lamp base

My living room needed some greenery so I created a tall floor plant to put by my sofa. I stitched together white chicklets from my stash for the base, but it desperately needed decoration and toning the whiteness down. I strung brown iris seed beads vertically between the grooves. Then, proceeded to brace them across the top and bottom. The coral zing serves as the turn around as I was trying to get cooperation from the vertical strings of beads. I netted the bottom of the pot since this will be viewed from all angles.

start of beaded potted plant

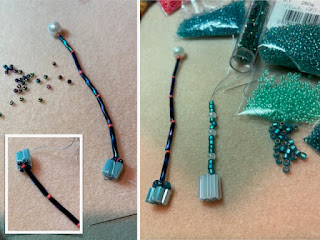
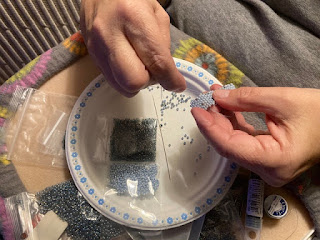
Since I was going to use the coralling twig technique to create the foliage, I strung a core of 8/o beads between white pearl 6/o pony beads which were going to be hidden under plant leaves. I strung metallic dark teal 10/o seed beads as branches from which I would create leaves. Each leaf has a random assortment of five shades and finishes of teal and green seed beads. The light green seeds from The Bag were generally placed at the tips of the leaves which were created as a loop was formed when the needle was inserted through the dark metallic string in random places.

adding foliage to beaded plant

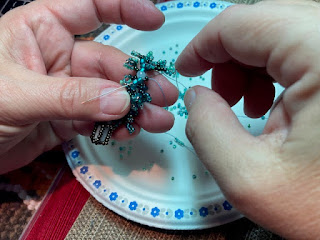
Coralling is best done in hand because firm tension is important. The leaves should stick out all over and overlap when branches cascade.

working on beaded plant in hand


Finished beaded plant


Hanging globe and curtains

Another challenge was dealing with the diagonally drilled black cubes and silver-lined blush seed beads.  This is where the globe lamp idea came. By stitching strings of nine seeds all around and through the diagonal cube, I managed to camouflage the black color. By sewing the globe onto a chain link, a chic fixture was born. So, I doubled it for my Mid-Century Modern living room! 

Beaded globe lamp

I decided to add a curtain from blush fine diamond craft paper. Homes in the 1950s-60s had smaller windows so shorter curtains would be perfect. This way they would not overtake the nice triangular wallpaper.

As I was designing, I kept on laying out the pieces on the wallpaper to see what goes where. What else can I add? What should I take away? My original thought of adding metal triangle corners was quashed once I saw everything coming together. These would have been a touch of nostalgia since they came from my mom’s T-shirt.

All the thread tails were used to stitch down the different pieces.

Room lay test

The curtains took a bit of playing around with length and finger folding. I took advantage of the repeat of the fine diamond print for establishing the depth of the pleats. The fine line around the diamond helped keep the stitches uniform with a small #1 bugle inserted between pleats. 

I had to use a really fine needle to go through the bugles and am glad I managed to thread a heavier bonded nylon string because this a craft paper, not fabric. I’m thrilled I was able to double the length of curtains by clever overlap of the repeat pattern. The biggest challenge was the start and end on both ends. A seed bead on each end gave me something to anchor and knot the thread around.

creating curtain folds


Stitching the living room to the craft paper

Before stitching my furniture to the wallpaper, I reinforced it to a wide double-side backing. The navy hexagon craft paper ‘rug’ was cut short. It was attached to the wall with double sided tape and positioned to allude to a low horizon.

The sofa was the first item to be stitched down. Positioning it just right to be believable was a challenge. I was thrilled I could carefully stitch the pieces rather than resort to glue. I had full control of with the needle and thread because I could go through beads and tack between bead stitches.

stitching sofa into place

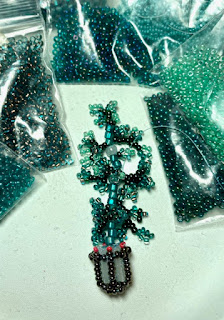
Stitching down the potted plant was pretty easy. I could position the foliage as needed; cover the pearl beads in the core; pull thread tighter so leaves stand out. I even added in a few light green beads near the bottom for sparkle.

stitching plant into place

The torchiere was also easy to stitch down thanks to the graphic pattern on the paper. I tacked between the coral seed beads so the bugles lay nice and flat. Once this was in place, it was time to carefully position the occasional chair. Note, it was finally placed much lower, closer to the front to create a comfy layout. Careful stitching of the chair cushions and tacking the bugle arms and chair legs were relatively easy.

stitching chair into place

To stitch down the curtains, it was necessary to tack between the pleats near the top. I also tacked near both lower ends so the curtains ‘hang straight’.

stitching curtains into place

The chain links of the globe lights were stitched along to top right. One globe was hung lower than the other for balance. Note how taut the torch light is in this side view. Everything is securely stitched. 

side view

I pinned my Mid-Century Modern Living scene to the linen background with the white pins provided with the shadow box.

pinned to linen background

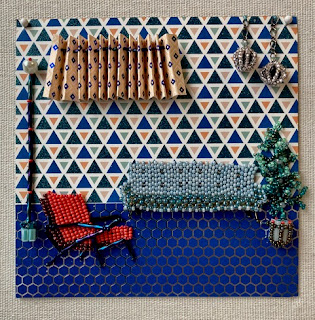
The glass of the shadow box will protect my beadwoven furniture and decor, but it’s impossible to photograph without glass reflections. 

completed shadow box

This Bag of Bead Challenge was fun once I got the idea. I enjoyed looking at different furniture images and figuring out how can I best beadweave them as stand alone pieces. It helped having knowledge of a host of stitching techniques and combining them as needed for the desired 3-dimensional furniture.