This Summer’s Toronto Bead Society (TBS)
Challenge is “Secret Garden”. It could be an original theme-based creation inspired by the book or movie. Or
one could use the colors from the inspiration picture palette and have fun.
 |
| Secret Garden image and palette |
Since the Secret Garden image was a really nice,
I decided to literally recreate it by “painting with beads” in a 3-bead net. It’ll be interesting to see all
the other original interpretation by my fellow beaders at the August 9th Reveal
online.
This image was used in a book cover for Frances
Hodgson Burnett’s The Secret Garden, published by Sovereign. Gillian
found the picture and was able to extract color
palette chips suitable for use in our challenge where one can choose to bead
something non-pictorial, but within the Summer Challenge rules.
I have long admired pictorial netted beadwork of
the Dayak tribes in Indonesia. The intricate symbols and designs seen in panels
hung in doorways or inserted in baby carriers are netted a few beads at a time
over a printed or drawn image. This technique was a practical solution to
getting the basic layout for my garden to match the inspiration.
Beads
I was determined to use beads in my stash and really
shocked how many variations of green seed beads I amassed! There were
silver-lined (s/l) variations, opaques, yellow-lined, grape-lined bottle green
and an aquamarine mix which needed to be separated to reveal the teal, emerald,
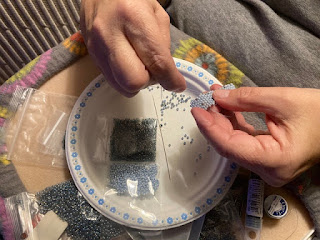
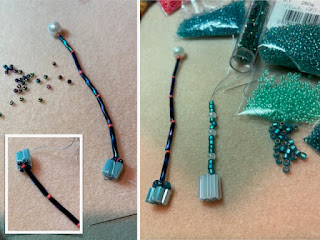
spring green beads I needed for my foliage. The most effective beads from my
stash were the Czech 8/o frosted beads with light green stripes because they
closely matched the distant sky in the image. They were so magnificent, they
determined the scale of my SECRET GARDEN!
 |
| Frosted green striped beads to start |
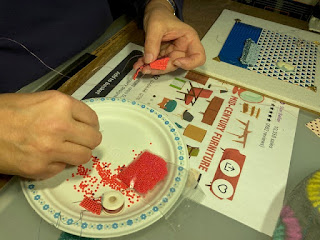
The advantage of using mid-sized 8/o seed beads
was the entire scene could be beaded quicker than finer Czech 10/o or 11/o
seeds! I tested my 3-bead net idea using my lightest spring green AB 10/o beads
for a few rows. The technical concept would work well, but the bright color was
garish! At this point I rooted through my collection of size 8/o seed beads.
Because they came from many sources, there were nuances in color, finishes,
donut-shapes (some thinner than others), a boxy Japanese grape-lined bottle
green. All diversity was perfect for “painting” my secret garden. The beads
reminded me of mosaic bits of glass and empowered me to throw in an odd bits of
color here and there to make my garden more alive.
 |
| Assortment of green beads |
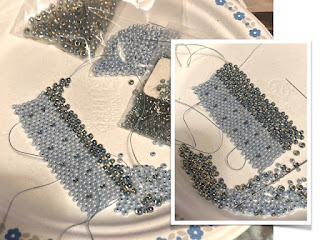
Note how I started off my garden in the same
size as my printed photo, but netting tends to “shrink” because of the very
nature of the way it is created. Since this was an artistic interpretation
Summer Challenge, no worries!
 |
| First two rows |
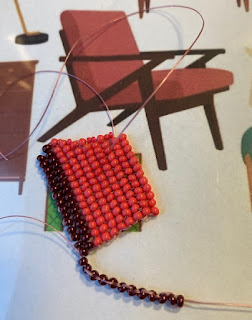
3-bead netting
In netting, deciding on how many beads to string
for the first row is a challenge because you need to visualize your turn around
for the next row. Netting 3-beads horizontally is easy in Row 2 and establishes
the start of the netted bead fabric. I started with a 5 bead turn on the right
and 4 beads on the left. Later, I settled on four beads on each side. Sounds
simple, but tricky when you’re actually beading! (This is when the push pin
breaking-a-bead comes in handy for the edges of the top three right rows once
they are already netted!)
 |
| Starting row 5 |
The photographs does
not truly convey all the nuances in color. Wish I had translucent dark forest
greens for the left side, but mixing s/l dark olive, bottle green with a bit of
metallic seeds had to do! Did you ever notice all the different colors which
come in a pack of navy iris or green iris? So many hues and shades to choose
from one bead at a time!
 |
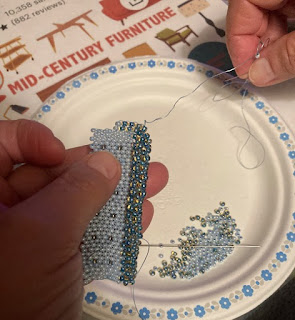
| Starting the light in the tower |
 |
| Laying beadwork on top of image |
The upper portion in between was light and
frosted. The tower on the right started off heavy at the top, but was later
replaced so there would be a single peak. The lights in the two windows
was clever color placement within two
3-bead nets. Lots of trial and error as I was bead painting along!
 |
| Added point to tower |
Then I remembered I had some 8/o opaque beads.
BINGO! Teal green, green and an olivey color would be perfect for adding in
foliage magic!
 |
| Opaque green beads to the rescue |
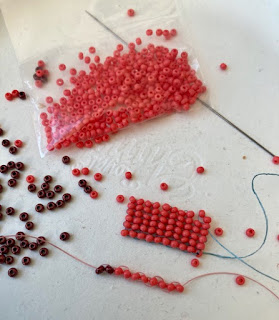
The blossoming trees presented a bit of a
challenge. How do I convey the sun-kissed lightness in the distance? Since I
had very few coral pink 8/o beads in my stash, I discovered coral-lined 11/o
would work well for the airy top. With a 5-bead string I could start the
flowering tree, as the center bead would be a natural spot to transition back
to my 3-bead net in medium-sized beads. This trick worked well!
 |
| Adding coral-lined 11/o for the top of the blossom |
 |
| Testing against the image |
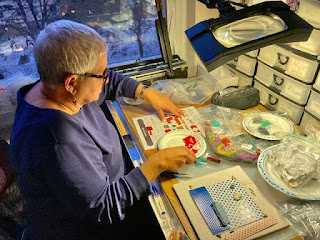
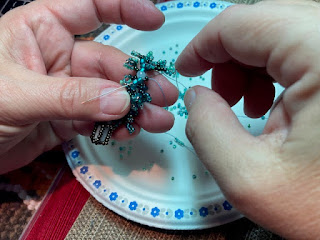
I got carried away with netting in my hand and
was visually “painting" with three beads at a time. The beauty and danger is the
beaded fabric is reversible so each side looks great! As I netted in the
right-handed direction, I flipped my Secret Garden over every time I came to
the turnaround. Without referring to the inspirational image, I was improvising
the blossoming tree, the distant lighter green centre, the darker trees. The
first tree grew very large before I noticed it is time to complete it and start
the top of the next tree in 8/o seeds. This part of creating my secret garden
was liberating and fun. By having some elements established I could freely play
off them free-hand.
 |
| Top blossom in progress |
 |
| The reverse side |
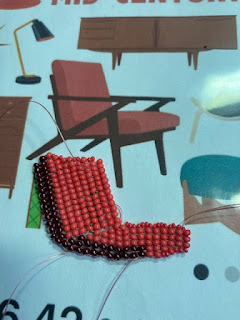
Slowly, I made my way down to the light path on
the right and several trees in bloom on the lower left side.
 |
| Beading in hand |
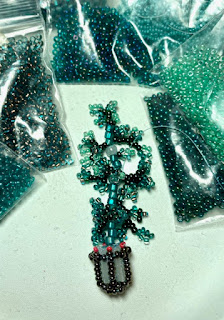
My pictorial section was finished, but not
complete.
 |
| Pictorial netting done |
Trim and loops
Since this was shaping up to be a banner, I trimmed
it was a mix of two different shades and sizes of green daggers. A tiny fuchsia seed on
either side give then zing because all the greenness would be too boring!
 |
| Adding daggers |
 |
| Showing off daggers |
To add even more zip, I added a huge fuchsia-lined
lt. topaz 2/o bead on top of each dagger grouping.
 |
| Adding fuchsia zing |
This way the FRONT was well defined. The reverse
is nice, but the front is complete with a 3-D pop of flowers.
 |
| Front and back once the fuchsia beads were in place |
Banners need loops to thread a rod through. My
Secret Garden was begging for a natural material, not a skewer. Pussy willows
from Palm Sunday blessing to the rescue! I found one with a reddish tone and
cut a twig willow from the bottom.
 |
| Willow twig for hanging |
The frosted green-striped beads were the innate
choice for bead loops. A single-bead ladder stitch with one needle was the
solution vs. stringing bead loops.
 |
| Ladder stitching the first loop |
I started by square stitching the first bead to
the center ‘anchor’ of the string of beads. Then, I ladder-stitched on eight
more seeds for a nine-bead tab. I created a loop by attaching the last ladder
bead to underneath side of the center bead.
 |
| Adding second loop |
I reinforced it by stitching through the loop
end and anchor bead and continued through the beads to the next string of
beads.
 |
| Securing the loop |
This is where I was grateful for the
well-defined banner Front and Back.
 |
| More than half of the loops done |
The loops were large enough to carefully wiggle
in the willow twig without disturbing the beads.
 |
| Sliding the loops onto the twig |
Now, how to display my Secret Garden? Because it
is two-sided, it could be hung in the window as a sun catcher, though it would
be a speck in my fifth floor condo window.
 |
| In the bright light on my balcony |
Better to place it in a shadow box frame as
‘art’.
 |
| Shadow box frame ready to go |
I like the
canvas-foam base which comes ready with glass-ball pins to hang the artwork. A
centering quilting ruler came in handy to figure out the spacing from the top
of my netted banner and the sides of the beadwoven art. In went the two pins at
an angle for the twig holder to rest on.
 |
Quilting ruler to help center banner
|
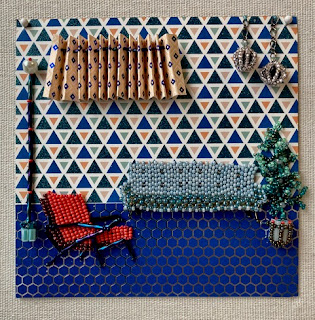
Voilà! The different
colors and finishes of glass seed beads remind me of mosaic tiles. This fact
gave me the courage to pick up odd-colored beads and weave them in a seemingly
random fashion. In my opinion, this is what make great art so wonderful!
 |
| Banner hanging against canvas |
While the
glass of the shadow box protects artwork, it distorts the view because of
glare.
 |
| All framed up |
Nothing beats
outdoor lighting when doing a photo shot!
Presenting my
SECRET GARDEN.
 |
| On the balcony |
Enjoy!